Atlas
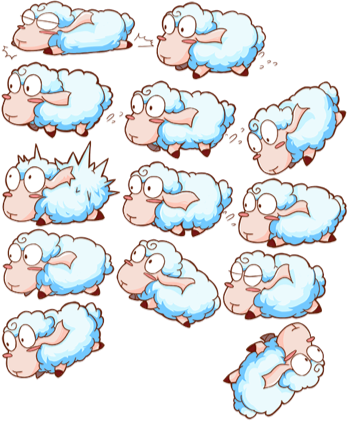
Atlas also named Sprite Sheet, it's a common asset in game developing. Atlas is generated by tools. The tools will combine many images into a large image and create an index file (such as plist). Altas asset contains plist & png is supported by Cocos Creator. Here is a image of an Atlas asset:
Why using Atlas
Advantages of Atlas:
- In the combin process, blank spaces of images will be removed. And many optimization algorithm will be used. So this will reduce the size & memory of the game.
- When many Sprites using SpriteFrame from one Atlas asset, they can be rendered in one render command. This will reduce CPU consumption.
Here is a video from CodeAndWeb, it will show you What is a Sprite Sheet。
Create Atlas Asset
You should prepare the original images for generating Atlas:
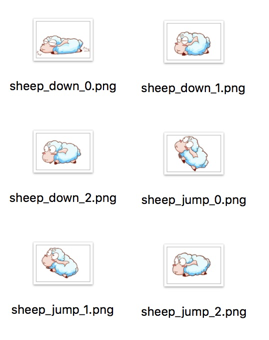
Then you can generate Atlas by special tools. We suggest:
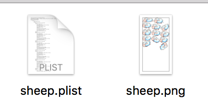
Please select plist files for cocos2d-x when export atlas by the tool. Then you will get plist & png with the same name:
Import Atlas
Drag plist & png files into Assets Panel at the same time. Then you can use it in Cocos Creator.
Atlas & SpriteFrame
In the Texture Document, we introduced the relationship between Texture & SpriteFrame. When Atlas asset imported, here is also a triangle icon beside the Atlas asset. Click it to expand Atlas asset. There will be many SpriteFrame sub-assets, each one can be used separately.
![]()
Convert separated images to atlas or Split the combined atlas workflow
In the project prototype stage or early production, art content and structure changes will be more frequent, we usually use the separated images to build the scene and make UI. In order to optimize performance and save the package, you need to merge the separated images into a atlas, or split or merge the contents of the altas.
At present we have provided a simple gadget to complete the scene in the picture resource reference from the separated images or old atlas to the new atlas of the redirection. The workflow is described below.
- Generate new atlas: You must use TexturePacker to generate a complete new atlas, whether you are merging from a separated images or re-splitting or merging the original episode. And then import the new chart into the project resource folder.
- Double-click to open the scene or Prefab where you need to redirect the resource reference
- Click "Developers -> Replace spriteFrame ... with the specified scene in the current scene" in the main menu, select your newly created atlas in the dialog box that opens, and wait for the replacement operation to complete. (If there are multiple new albums, you should repeat this step until all the relevant new albums are replaced)
- If you have multiple scenes or prefab, you need to repeat 2-3 steps, traverse each relevant scene or Prefab
- After confirming that all references to the associated image resource have been replaced by the new atlas, you can now delete the original broken or old gallery.
Continue on to read about Trim.